Models & viewer
Upload the IFC, wait for conversion, open it in the browser, navigate it, find things in it, save views, section it, measure it, and raise records from it.
Related: Issues, RFIs & clashes · 4D & 5D · Glossary · Troubleshooting
Models
What it does
Ingests IFC files (and point clouds), converts them to streaming geometry, and indexes every element into the project's model graph so that issues, clashes, inspections, assets and quantities can attach to elements by their stable identity.
Who uses it and why
BIM managers and model authors upload; everyone else consumes what they upload. A project without a READY model has nothing to coordinate.
Prerequisites
- Project role Admin or Upload Engineer.
- An IFC file (IFC2X3 or IFC4) or a point cloud:
.ifc · .frag · .las · .laz · .e57 · .ply · .pts, up to 4 GB per file. - The background worker must be running on the server (an operator concern — if uploads sit at
queuedfor minutes, see Monitoring & health).
Step-by-step
- Rail › Models. Drop the file on DROP IFCS OR POINT CLOUDS HERE, OR CLICK TO BROWSE.
- The row appears with Status
queued→converting→ READY (orfailed). The Cloud activity icon in the top bar shows the same job. Conversion of a 200 MB IFC takes minutes. - When it is READY, the row shows Elements (the indexed count), Size, Version (V1) and a CDE badge (starts as WIP).
- Open the rail › 3D Viewer. The model is listed in the Models panel and the camera frames it once the first geometry arrives.
- Uploading a file with the same name later creates V2 in the same version group; the older version is superseded but its history stays under Version history.
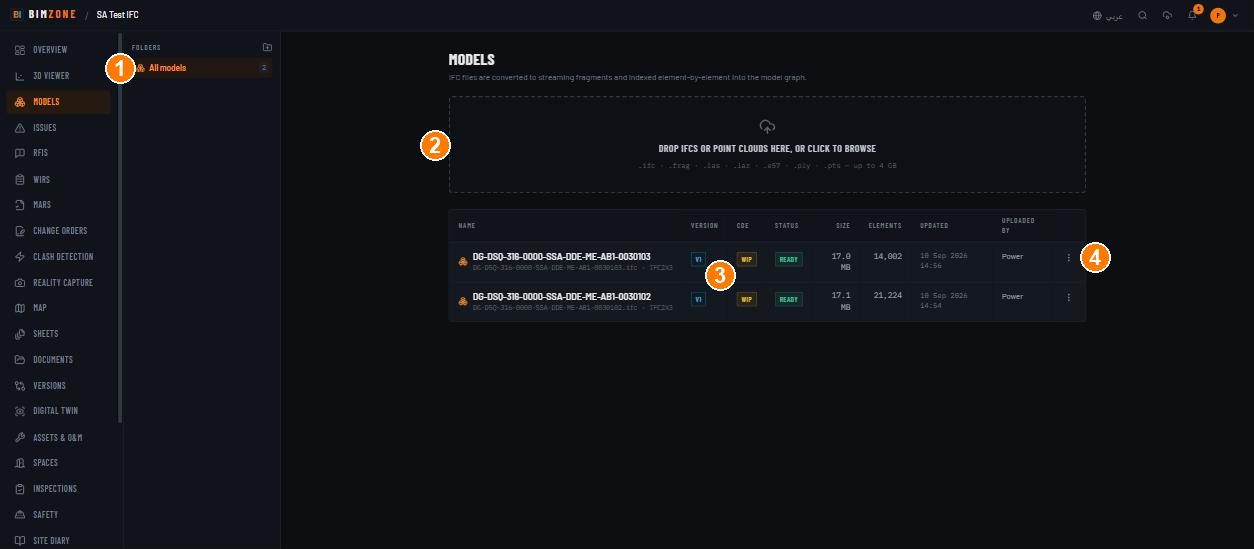
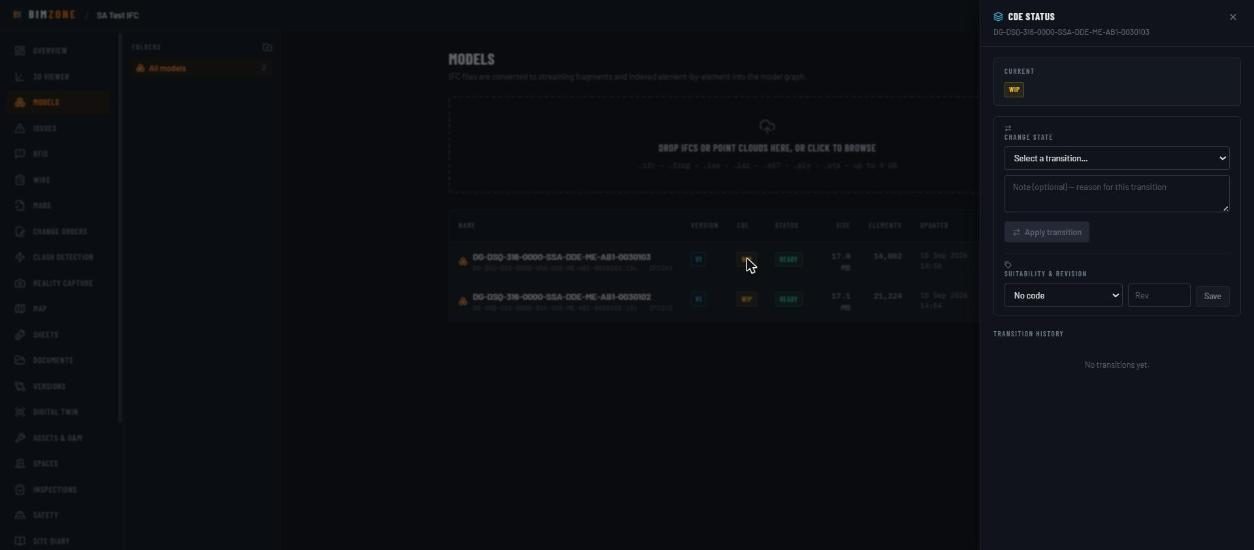
1 · folders · 2 · drop zone · 3 · CDE badge (click for the CDE status drawer) · 4 · row actions
Controls
- Folders (left): All models plus any folders you create with New top-level folder; a model is moved with the row menu.
- Table: Name (file name · IFC schema) · Version · CDE · Status · Size · Elements · Updated · Uploaded by.
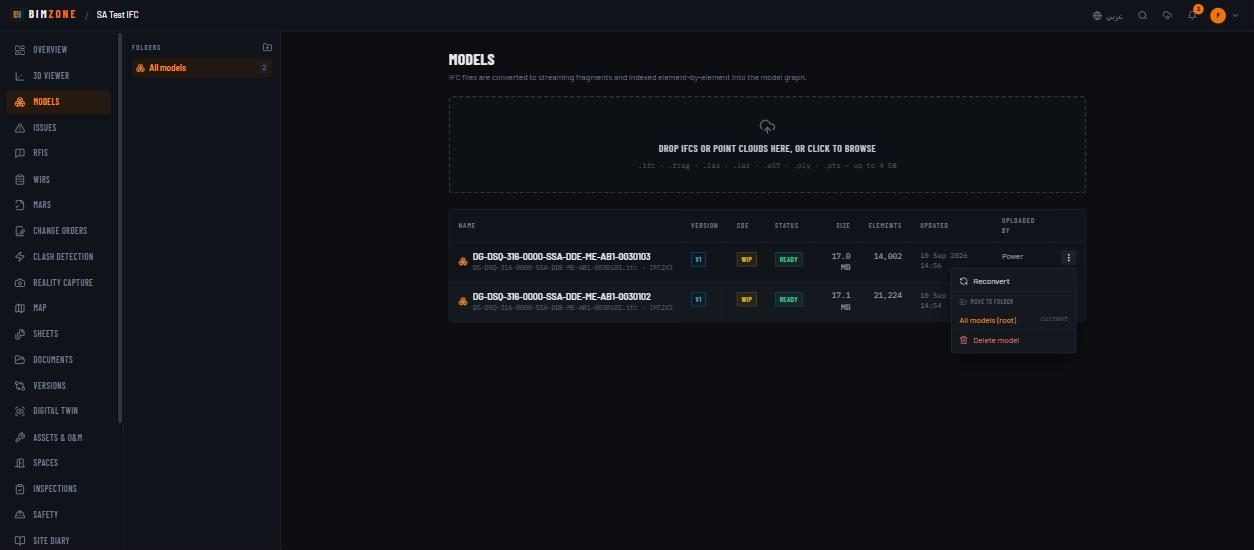
- Row buttons: Version history · CDE status & transition history · Row actions (⋮).
- Row actions: Reconvert (regenerates the geometry and tiles with the current converter — use it on models uploaded before tile streaming existed, or after a failed run) · Move to folder · Delete model. A failed conversion shows Retry conversion on the row.
- CDE status drawer: Current state · Change state (Select a transition… — the transitions the server allows for you, e.g. Share for coordination, Archive) · Note (optional) — reason for this transition · Apply transition · Suitability & revision (code from the project's allowed list, Rev, Save) · Transition history.
What happens after
READY models are streamed to the viewer in tiles (first geometry in seconds on a fast link), listed in the Tree and Groups panels, available to clash tests, quantity takeoff, IDS checks, spaces (IfcSpace elements) and the digital twin. A CDE transition is recorded with who, when and the note.
Connections to other modules
Viewer, Tree, Clash Detection, Versions, Spaces, Assets, Takeoff, Standards & 4D (IDS runs and activity links), Digital Twin, Progress. The CDE badge is the same ISO 19650 state machine used by Documents.
Data in / data out
In: IFC / FRAG / point-cloud files. Out: the converted geometry is downloadable per model in the viewer's Models panel (Make available offline (download geometry)); element data flows to every export (BOQ, clash BCF, issue BCF, COBie) rather than being exported from this page.
Permissions and approval
Upload, move, align: Admin and Upload Engineer. Reconvert, delete: Admin. CDE transitions: those the server offers for your role (Upload Engineer can share for coordination; Admin can archive). Publish is maker-checker: someone other than the model's uploader. Document review rounds are covered in CDE, documents & sheets.
Common mistakes and troubleshooting
- Status stays
queued— the worker is not running or is busy; check Cloud activity, then the operator runbook. Nothing is lost; the job resumes. failed— press Retry conversion. If it fails again the IFC is usually malformed (a geometry-free file, a truncated export). Re-export from the authoring tool.- Viewer shows the model kilometres from another model — the two files use different coordinate origins. A banner explains it; re-export with shared coordinates, or use Align model in the viewer to nudge one into place.
- Old model takes a minute to show — it was converted before tile streaming; Reconvert it.
- Element count is 0 after READY — the IFC has no elements the indexer recognises (e.g. a pure site/terrain file); check the source.
Limitations and integration prerequisites
- 4 GB per file; very large IFCs convert for many minutes.
- DWG/RVT are not accepted here (export IFC from the authoring tool). Autodesk Construction Cloud models can be imported through Integrations › ACC.
- Point clouds are viewed in the viewer's Point cloud mode and used by Reality Capture; they are not clash-tested.
Where to go next
3D viewer
What it does
Streams the converted models to the browser and lets you navigate, select, inspect, measure, section, colour, mark up, play the 4D programme and raise issues in place. It is the hub every other module opens from and returns to.
Who uses it and why
Everyone with access to the project. Viewers use it read-only; coordinators raise issues and verify clashes from it; field staff fly to elements from inspections and issues.
Prerequisites
At least one READY model. WebGL 2 in the browser. For 360 scene and Split modes: at least one 360° scene captured in Reality Capture; for Point cloud mode: a point-cloud model.
Step-by-step
- Rail › 3D Viewer. Wait for "N models · N elements" in the status bar; the camera frames the models once geometry arrives.
- Orbit (left-drag) and zoom (wheel); the Navigation tab of Render settings tunes the feel. Use the ViewCube or the FRONT / BACK / RIGHT / LEFT / TOP / BOTTOM buttons for orthographic snaps; Fit model to re-frame.
- Click an element: the status bar shows
CATEGORY · name · GUIDand the element panel opens (Properties, Quantities, Node activity, and chips for every record attached to that element). Double-click for the element's tools. - Use the left panel: Models (opacity, visibility, offline geometry), Tree (find a level, room or type; isolate/hide), Groups (storeys and IFC categories with counts), Views (save the camera + isolation as a named snapshot).
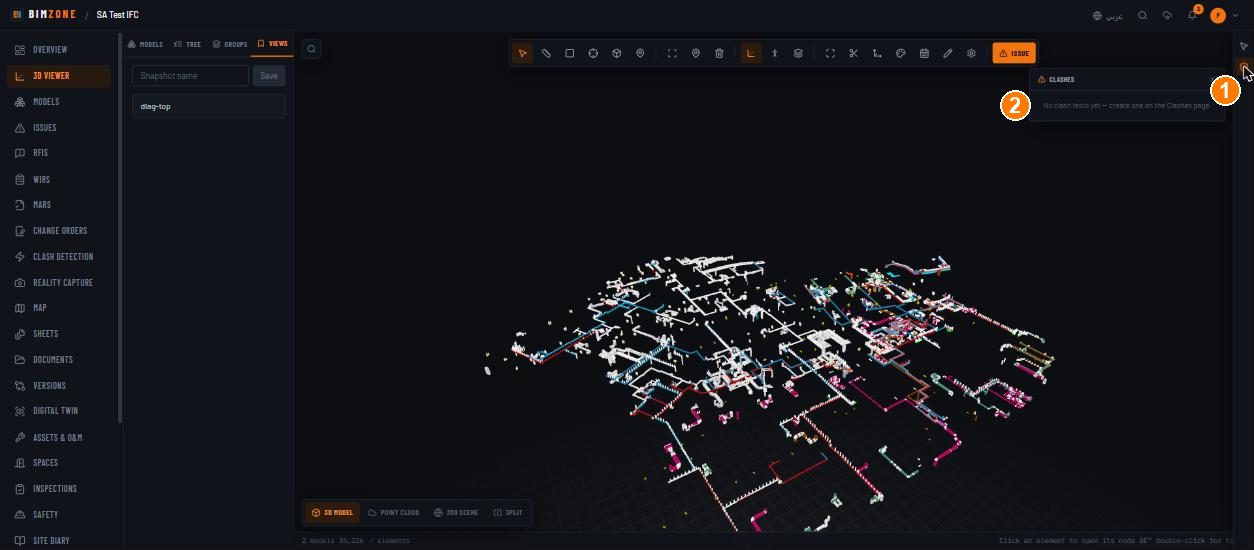
- Raise records: Issue (orange button) opens New issue with the selected element and the current camera attached; Add annotation pin on selected element drops a pin; the right-edge Verify — review clashes in 3D opens the clash panel.
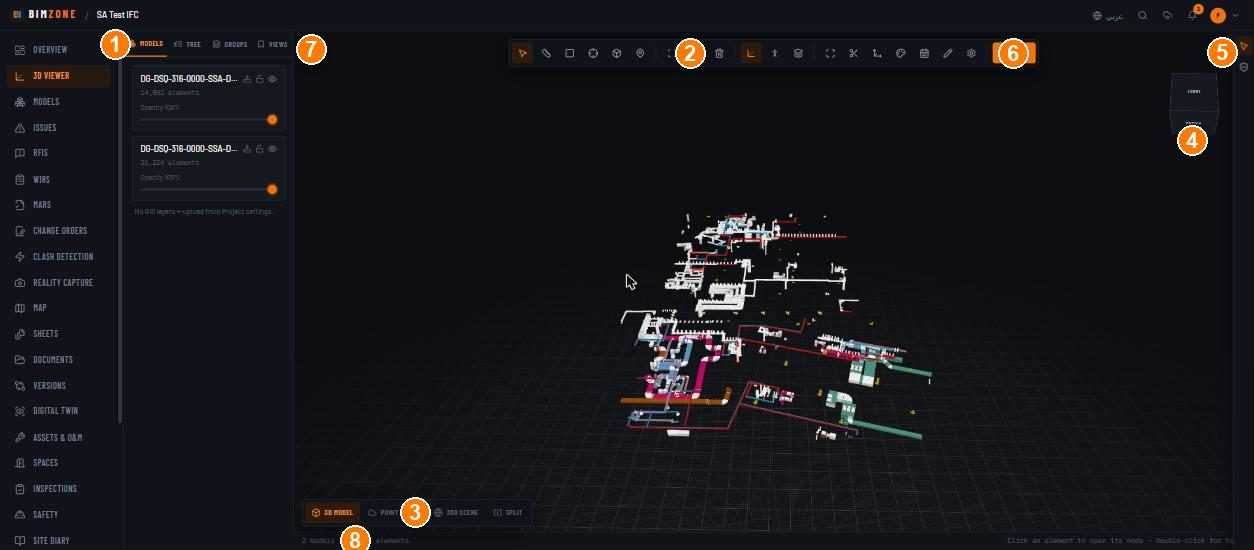
1 · Models / Tree / Groups / Views panel tabs · 2 · toolbar · 3 · 3D MODEL / POINT CLOUD / 360 SCENE / SPLIT mode switch · 4 · ViewCube · 5 · right-edge strip (Select / Verify clashes) · 6 · Issue · 7 · Find an element · 8 · status bar
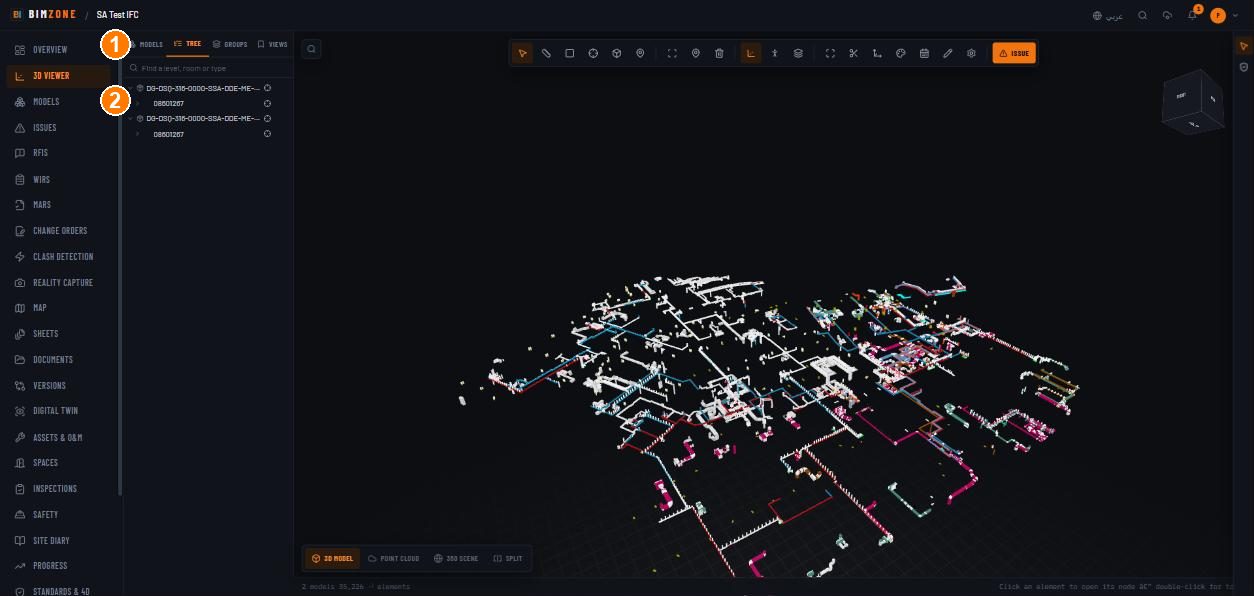
Tree tab: search "Find a level, room or type"; Isolate / Hide on every node
Controls
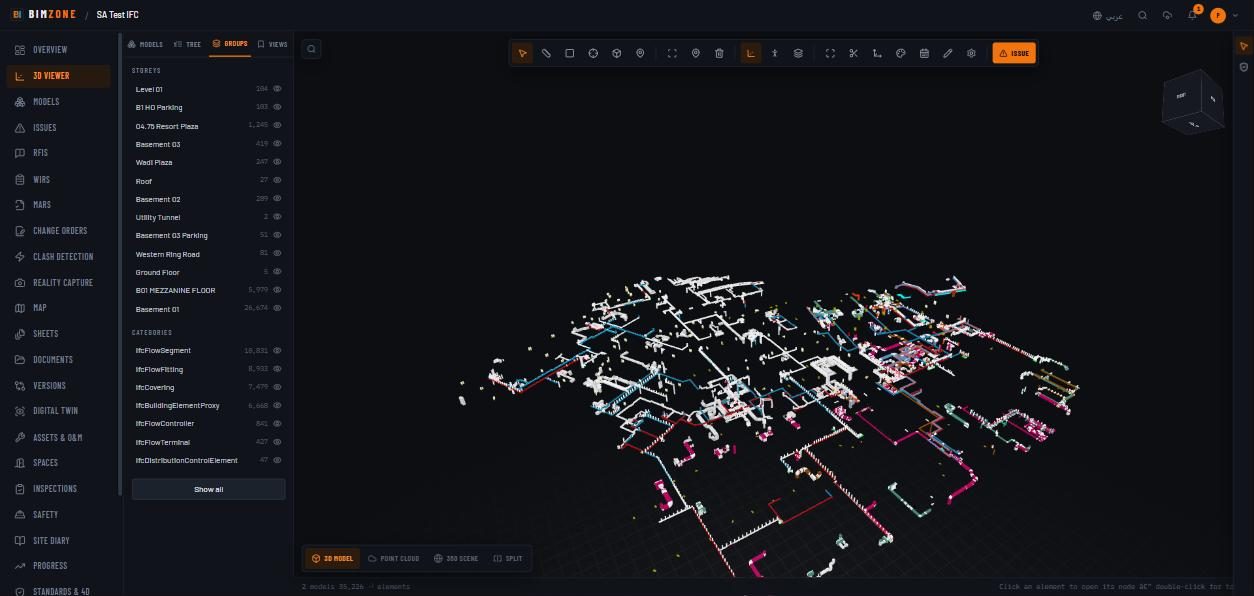
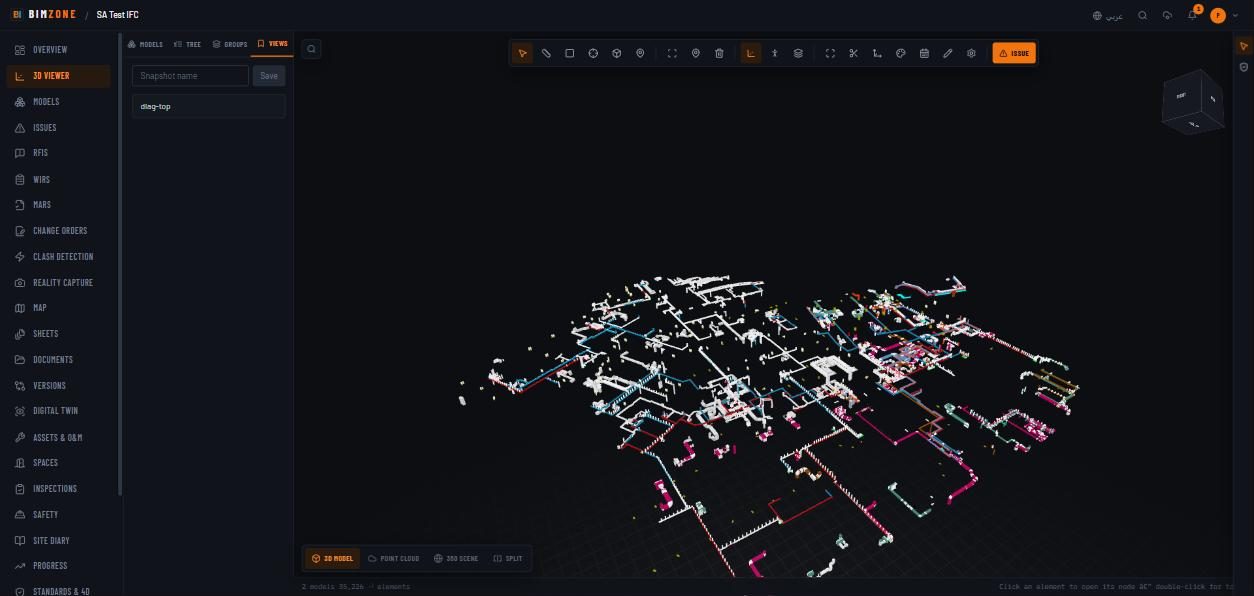
Left panel - Models — per model: name, element count, Opacity slider, Make available offline (download geometry), Lock selection (disable raycast), visibility (eye). Footer: GIS layers uploaded in project settings (or "No GIS layers — upload from Project settings."). - Tree — search box (Search the model tree); model › site › building › storey › type › element; on each node Isolate and Hide; expand/collapse. - Groups — STOREYS and CATEGORIES (IfcFlowSegment, IfcCovering…) with counts and visibility toggles; Show all restores everything. - Views — Snapshot name + Save; saved views restore camera and isolation. A saved view captured against a different base model warns you when restored.
Toolbar (centre top) — hover shows the tooltip quoted here: Select · Length — double-click to place points · Area — double-click points, Esc to close · Angle — 3 double-clicks · Volume — double-click a closed element · Coordinate marker — click the model to drop a georef pin · X-Ray (transparent) view · Add annotation pin on selected element · Clear measurements, sections & coord markers · Orbit navigation · Walk mode (WASD + mouse) · Plan view (orthographic) · Fit model · Sectioning tools — planes & section box · Align model — nudge a misaligned federated model into place · Color by property (category / storey) · 4D timeline — simulate construction by date · Markup — draw over the view (orbit suspended while active) · Render settings · Issue.
- Sectioning tools: Plane / Box; Add plane ("Double-click a face in the model to place the plane."); toggles Show frame, Show gizmo, Rotate gizmo, Show hatches.
- Align model: per model Translation (m), Rotation (deg), Scale, Advanced axes; Save / Reset ("Alignment saved").
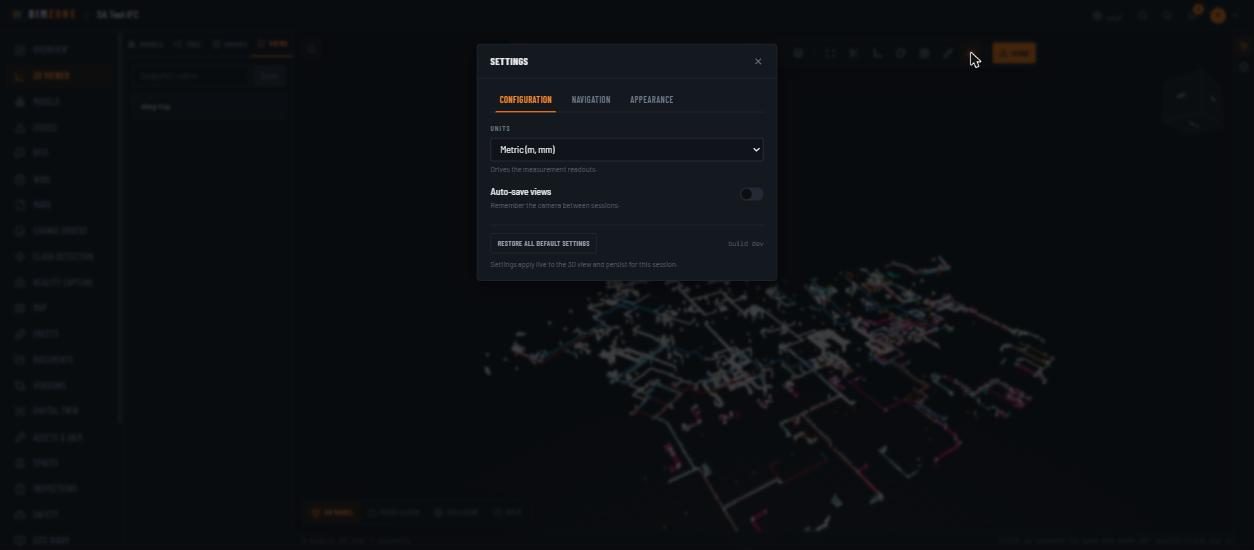
- Render settings (Settings dialog): Configuration (Units: Metric (m, mm) / Imperial (ft, in) — "Drives the measurement readouts."; Auto-save views — "Remember the camera between sessions."; Restore all default settings) · Navigation · Appearance. "Settings apply live to the 3D view and persist for this session."
- 4D timeline: picks a programme imported under Standards & 4D; rewind/play; 1d/s · 7d/s · 30d/s · 90d/s; PLANNED / ACTUAL; date scrubber; "N% through programme". Without a programme it says "No schedules imported — add one from Standards › Schedule."
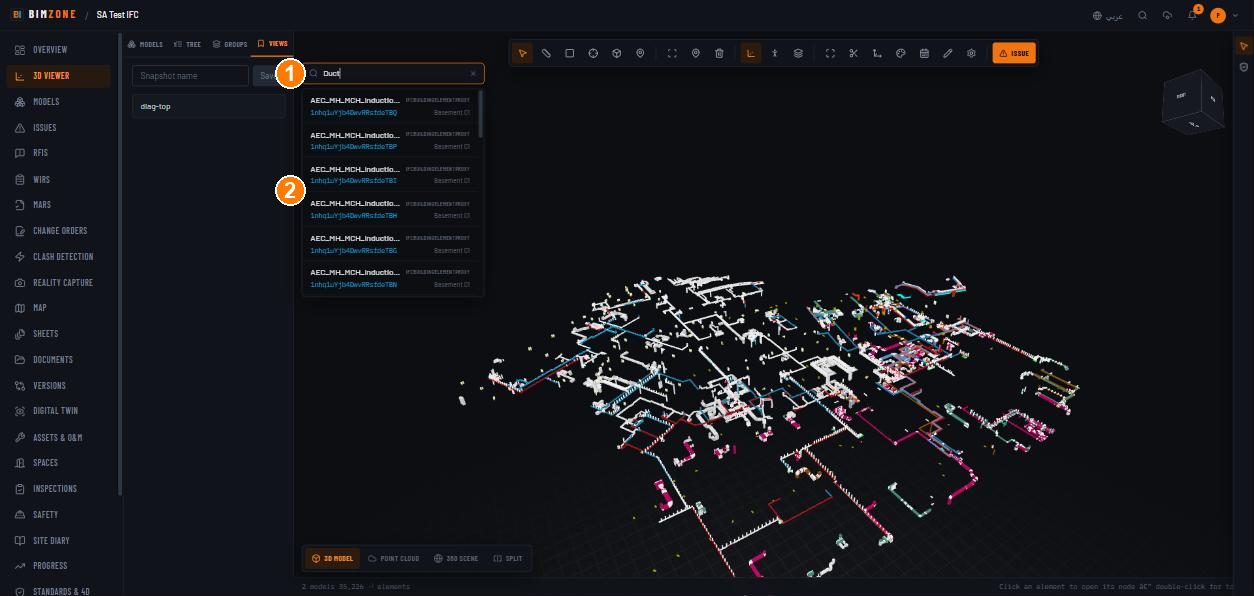
Top-left — Find an element: type part of a name; results show name, IFC type, GUID and storey; Enter flies to it (or "Could not locate that element in the loaded model" if its geometry is not streamed yet).
Bottom — mode switch 3D MODEL · POINT CLOUD · 360 SCENE · SPLIT. Split shows the 3D model and the nearest 360 scene side by side; the tooltip explains why a mode is unavailable ("No 360° scenes captured for this project", "No point-cloud models in this project", "Screen too narrow for split view — use 3D or 360 separately", "Still converting").
Right edge — Select — pick and inspect elements · Verify — review clashes in 3D (the clash panel: filter "Filter by name, GUID, group…", pick a clash to ghost the model and paint the two elements).
Element panel — tabs Properties, Quantities, Node activity; chips Issues · RFIs · Clashes · Annotations · Documents · Sheets · Photos · Inspections · Inspection requests · Material approvals · Asset · Revision history; Progress override (admins: Percent complete + Set — "Replaces the derived figure for this element only. Recorded in the audit log with the previous value."; Clear override returns the element to its derived figure).
Sharing a view — save a view, then Copy share link on it copies a deep link ("Snapshot link copied — teammates land at this exact view"). Issues and clashes carry their own viewpoint links.
What happens after
Nothing you do in the viewer changes the model. Measurements, sections and markers are per session (Clear removes them); saved views, annotations, issues and alignment are persisted to the project.
Connections to other modules
Selection drives the element panel, which links to every register. Issue creates an issue with element + viewpoint. Verify shows clash results from Clash Detection. The 4D timeline plays the programme from Standards & 4D and hides elements not yet built. The coordinate marker uses the project georeference. Sheets' "Open in 3D" and issues' "1 element" chips fly here.
Data in / data out
In: converted geometry (streamed), the element index, saved views, annotations. Out: Make available offline (download geometry) per model; snapshot links; nothing else leaves the browser.
Permissions and approval
Everyone can navigate, measure and section. Annotations and snapshots: any role but Viewer. Raising issues from the viewer needs Upload Engineer or Admin (Inspectors raise photo- and inspection-linked issues only). Align model: Upload Engineer or Admin. Progress override and GIS layers: Admin. No approvals apply.
Common mistakes and troubleshooting
- Blank canvas, no error — WebGL context lost (usually another GPU-heavy tab). Reload the tab.
- Zoom cannot reach a detail / camera jumps back — the loader's end-of-load fit; wait for "N models · N elements" before navigating, or press Fit model once.
- Black eats into the model when zooming close — a very large model far from origin; use Align model or re-export nearer the origin; the depth buffer handles ordinary cases.
- Element found in search but "Could not locate…" — its tile has not streamed yet; wait, or isolate its storey in Groups first.
- Section plane will not place — you must double-click a face; single clicks select.
- 4D timeline hides everything — no activities are linked to elements yet; link them under Standards & 4D.
- Measurements in the wrong unit — Render settings › Configuration › Units.
Limitations and integration prerequisites
- Geometry shared between models is not de-duplicated in the browser; two copies of the same building cost twice the memory.
- Split and 360 modes need captured 360° scenes; point-cloud mode needs a point cloud upload.
- Walk mode is keyboard/mouse (WASD); there is no VR mode.
Where to go next
Tree, groups and saved views below, then Issues, RFIs & clashes.
Tree, groups and saved views
What it does
Three ways to narrow a large federated model to what you are working on: the hierarchical Tree, the flat Groups (storeys and categories), and Views that remember camera + isolation.
Who uses it and why
Anyone reviewing a model — a coordinator isolating one storey, an inspector hiding everything but the ductwork, a manager returning to the same saved viewpoint every week.
Prerequisites
A READY model open in the viewer.
Step-by-step
- Tree tab › type in Find a level, room or type (e.g. "Basement 01" or "IfcFlowTerminal") › on the node press Isolate (everything else hides) or Hide.
- Groups tab › untick storeys or categories with the eye toggle › Show all when done.
- Frame what you want, then Views tab › Snapshot name › Save. Click a saved view later to restore it (camera and isolation).
- For a project-wide reusable rule set (e.g. "all fire dampers on L3") create a Search set in Settings › Search sets › New search set: Name, then Rules (combined with AND) — each rule is a field (Category · Name · Storey · Property), an operator (equals · contains · starts with) and a value (categories are picked from the IFC classes present in the models); Add rule for more, Save. Search sets are "used for scoped clash detection and viewer filtering". (The empty state also mentions Navisworks appended sets; there is no import for them today — rebuild the set with rules.)
Controls
Tree search · Isolate / Hide per node · Collapse / Expand · Groups eye toggles · Show all · Snapshot name · Save · saved-view list (click to restore).
What happens after
Tree and Groups changes are per session. Saved views persist to the project and are visible to every member; Auto-save views in Render settings remembers your last camera across sessions.
Connections to other modules
Search sets (project settings) feed Clash Detection › New clash test › Search set vs search set. Saved views are the basis of issue viewpoints. Isolation state is captured in saved views.
Data in / data out
In: element index. Out: saved views (project data); nothing exported.
Permissions and approval
Everyone can use the panels. Saving views: any project member except Viewer. No approvals.
Common mistakes and troubleshooting
- Saved view restores to the wrong place — "This saved view was captured against a different base model — the camera may not frame what it did." Re-save it against the current model set.
- Isolate shows nothing — the isolated node has no streamed geometry yet; wait or pick its parent.
Limitations and integration prerequisites
Tree and Groups are per model set; they do not persist between sessions (use Views or Search sets).