Field¶
Everything that happens on site: inspection requests against the ITP, material approvals, checklist inspections and punch lists, incidents, the daily diary, 360° capture and site photos, observed progress, and the change orders that follow.
Related: Issues, RFIs & clashes · Roles › Site / Field · Reports & analytics · Troubleshooting
Work Inspection Requests (WIRs) and the ITP¶
What it does¶
Formal WIRs against the Inspection & Test Plan: request an inspection when work is ready, schedule it, record the outcome (passed / failed / conditional), witness hold points, and sign off — with segregation of duties at every decision.
Who uses it and why¶
Site engineers raise WIRs; QA/QC inspectors and the consultant decide them; the ITP register is kept by the QA lead.
Prerequisites¶
Any role but Viewer to raise (Admin, Upload Engineer, Inspector); any non-viewer member other than the submitter to decide. An ITP with clauses if you want to reference hold/witness points.
Step-by-step¶
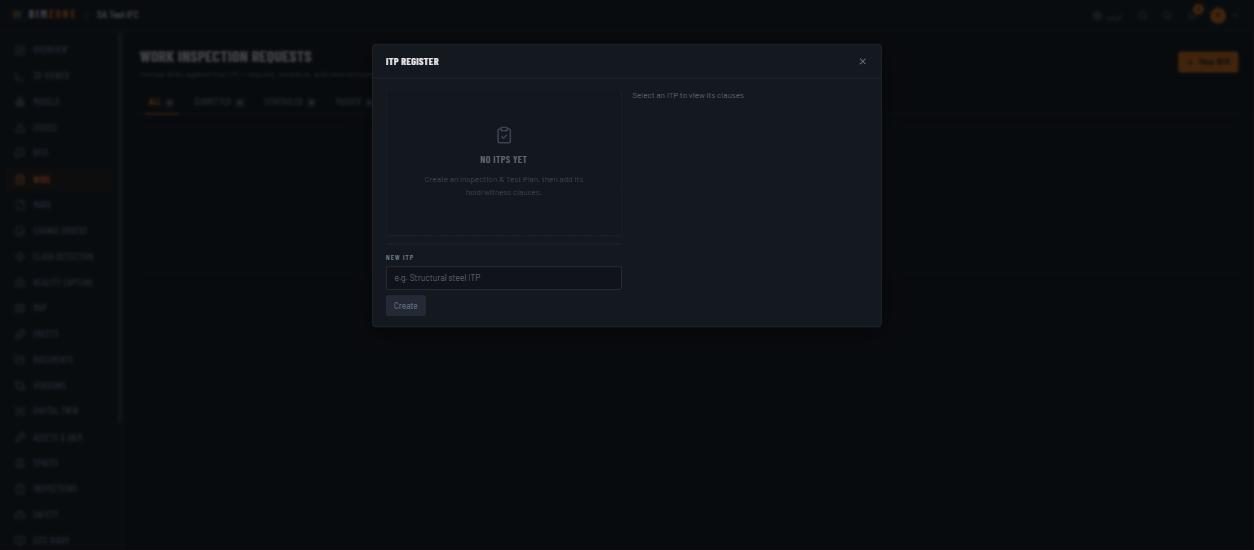
- WIRs › ITP register (icon beside the title) › New ITP name (e.g. "Structural steel ITP") › Create; select it and add its hold/witness clauses. "Create an Inspection & Test Plan, then add its hold/witness clauses."
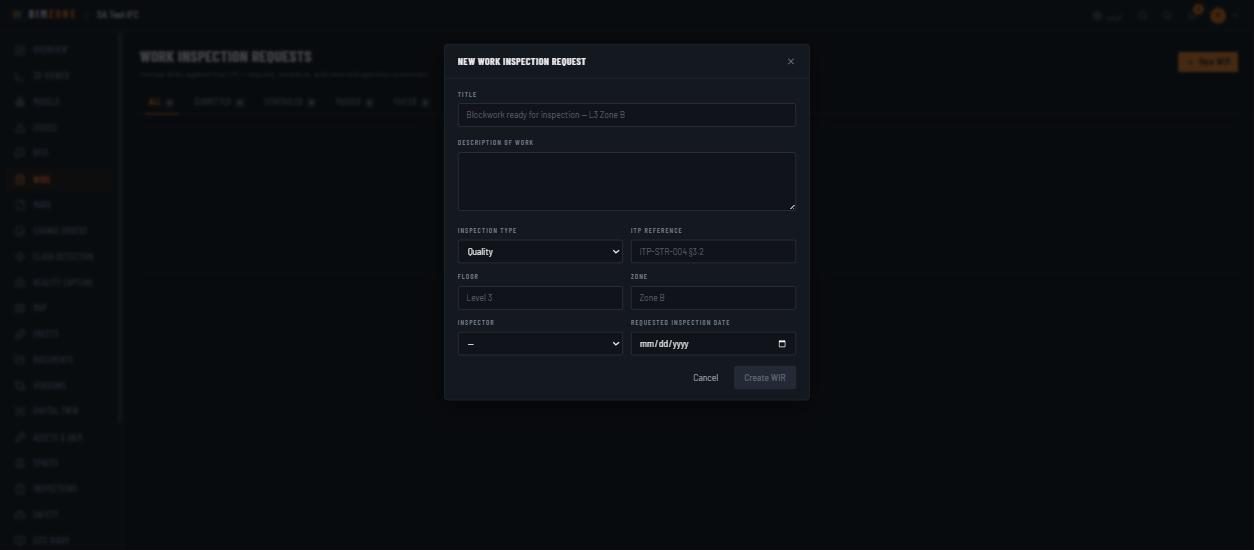
- WIRs › New WIR: Title ("Blockwork ready for inspection — L3 Zone B"), Description of work, Inspection type (Quality…), ITP reference (ITP-STR-004 §3.2), Floor, Zone, Inspector, Requested inspection date. Create WIR. It is Submitted.
- The inspector opens it, sets Status to Scheduled (or decides directly), links the model element / inspection if useful, and after the visit sets Passed, Failed or Conditional (conditional stays editable until it becomes passed or failed).
- Hold points on ITP clauses are released and witnessed by someone other than the submitter; the final sign-off likewise.
Controls¶
Tabs All / Submitted / Scheduled / Passed / Failed / Conditional · New WIR · ITP register (list, New ITP, clauses per ITP) · WIR drawer: Status select, Inspector select, linked inspection, linked model element, ITP clause, signature/sign-off.
What happens after¶
Status changes notify the submitter and inspector and are audited. A passed WIR is terminal; a failed one is terminal too — raise a new WIR after remediation. Decisions are recorded with who and when.
Connections to other modules¶
Inspections (a WIR can reference a checklist inspection), Viewer (element link; the element panel's Inspection requests chip), Issues (defects found), Analytics.
Data in / data out¶
In: the form, the ITP clauses, attachments. Out: register views; WIR data appears in the progress report where relevant.
Permissions and approval¶
Workflow submitted → scheduled → passed | failed | conditional (submitted may be decided
directly; conditional → passed | failed). Passed / Failed / Conditional, witnessing, hold-point
release and sign-off must all be done by a user other than the submitter. Viewers read only.
Common mistakes and troubleshooting¶
- Cannot decide your own WIR — by design; the inspector or another member decides.
- ITP clause not offered — the clause belongs to another project's ITP or was not created yet.
- "Passed" is greyed — the WIR is already terminal; raise a new one.
Limitations and integration prerequisites¶
No external inspection apps sync into WIRs.
Where to go next¶
Material Approval Requests (MARs)¶
What it does¶
Formal material submittals with spec references, manufacturer data, a submittal package of attachments and an approval decision trail (approved / approved with comments / rejected).
Who uses it and why¶
Contractors submit; the consultant's reviewer decides; procurement and QA track.
Prerequisites¶
Role Admin or Upload Engineer to submit; an Admin or Upload Engineer other than the submitter to decide (the Reviewer field records who is expected to; the server enforces the role and "not the submitter", not the named reviewer).
Step-by-step¶
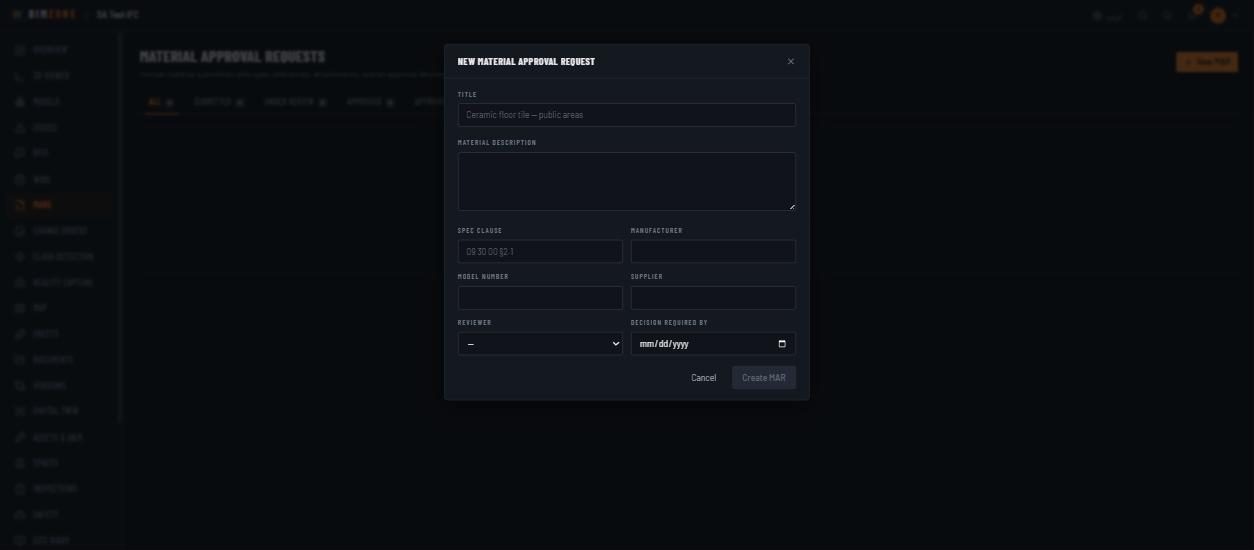
- MARs › New MAR: Title ("Ceramic floor tile — public areas"), Material description, Spec clause (09 30 00 §2.1), Manufacturer, Model number, Supplier, Reviewer, Decision required by. Create MAR (state Submitted).
- Open it and attach the Submittal package (datasheets, samples, certificates).
- Press Move to review (state Under review).
- The reviewer decides: Approved, Approved with comments, or Rejected. Decisions are terminal — they bind the exact content the reviewer saw; resubmit as a new MAR after changes.
Controls¶
Tabs All / Submitted / Under review / Approved / Approved with comments / Rejected · New MAR · drawer: fields, Submittal package ("No files attached yet."), Move to review, decision actions. (There are no comments on a MAR; discuss in the linked issue.)
What happens after¶
The reviewer is notified; decisions are audited and the register filters reflect them.
Connections to other modules¶
Viewer (element link; Material approvals chip), Issues, Analytics, Site Diary.
Data in / data out¶
In: form and attachments. Out: register; attachments downloadable from the drawer.
Permissions and approval¶
Workflow submitted → under_review → approved | approved_with_comments | rejected
(submitted → approved_with_comments is also allowed directly). Every decision must be made by a
user other than the submitter; Approved and Rejected require the review step first.
Common mistakes and troubleshooting¶
- Approve is refused from Submitted — press Move to review first.
- Cannot approve — you submitted it.
Limitations and integration prerequisites¶
No procurement-system sync.
Where to go next¶
Inspections and punch lists¶
What it does¶
Checklist inspections (quality, safety, compliance, maintenance) with pass/fail items and photos. Failures auto-generate issues; compliance failures become critical issues. Versioned checklist templates can be instantiated across units, and the register prints a bilingual Punch list PDF.
Who uses it and why¶
Inspectors and site engineers on a tablet; QA leads who own the templates; managers who read the punch list.
Prerequisites¶
Role Inspector or Admin ("Only Admins and Inspectors" may create and fill inspections; Upload Engineers read). Templates (optional) under Checklist templates.
Step-by-step¶
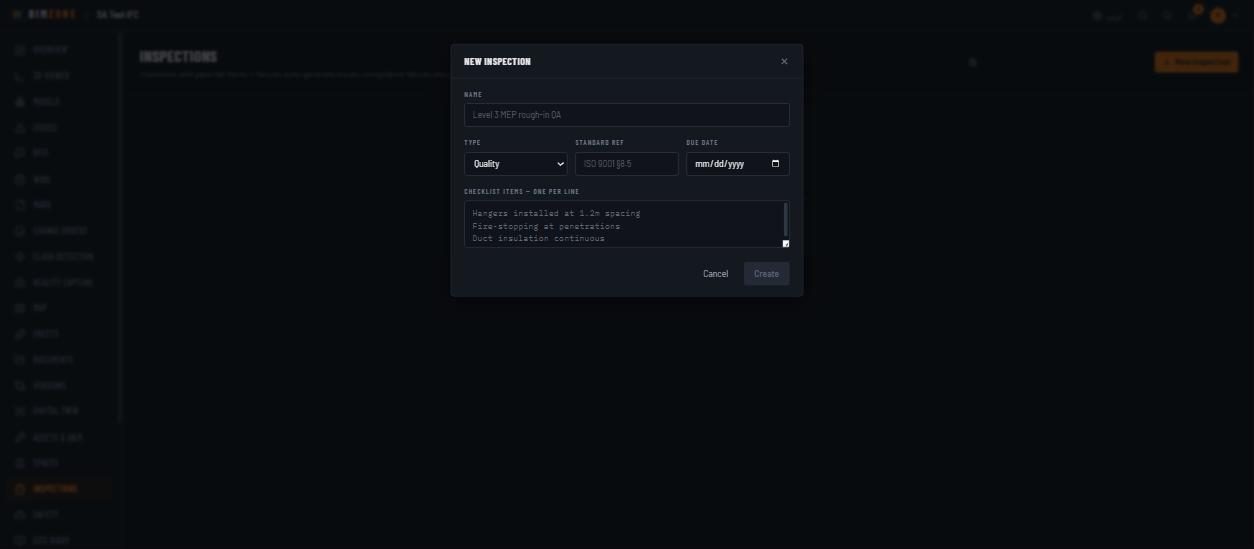
- Inspections › New inspection: Name ("Level 3 MEP rough-in QA"), Type (Quality · Safety · Compliance · Maintenance), Standard ref (ISO 9001 §8.5), Due date, Checklist items — one per line. Create.
- Or from a template: Checklist templates › New template (name, Checklist items — "One per line: text, or text | clause, or text | clause | section", or Import CSV with columns section, clause, text, responseType, required) › select it › Units ("One location per line, optionally location | elementGuid") › Instantiate. Templates are versioned (New version).
- Open the inspection; mark each item pass / fail / n/a, Add photo as evidence (EXIF location data is stripped on upload), set the Inspection status as you go (open → in progress → completed).
- Every failed item creates an issue automatically (critical for compliance types).
- Choose the PDF language (EN + AR · English · العربية) and press Punch list for the open defects report.
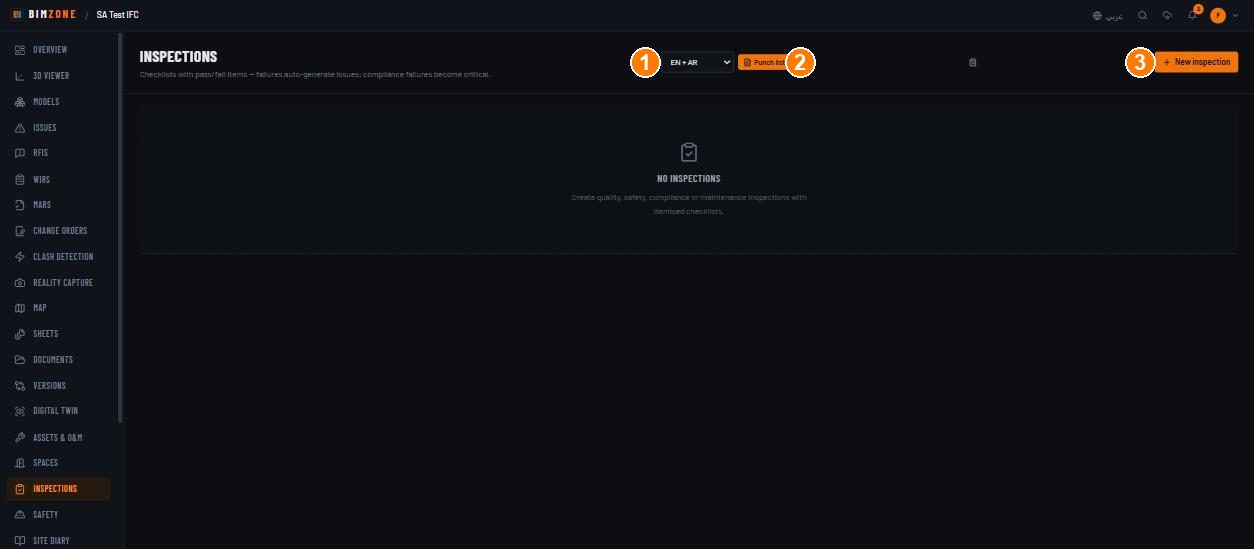
1 · PDF language · 2 · Punch list · 3 · New inspection (the icon between them opens Checklist templates)
Controls¶
Language select · Punch list · Checklist templates (library: New template, Import CSV, New version, Units, Instantiate) · New inspection · inspection drawer: items with pass/fail/n/a, Add photo, Inspection status, due date.
What happens after¶
Failed items → issues (assigned per the inspection); photos attach to the element when the inspection is linked to one; the Site Diary counts photos captured; Analytics shows inspection activity.
Connections to other modules¶
Issues, Viewer (Inspections chip), WIRs (an inspection can back a WIR), Site Diary, Reports (punch list), Safety.
Data in / data out¶
In: checklist text, CSV templates, photos. Out: Punch list PDF (bilingual), photos CSV/XLSX under Analytics.
Permissions and approval¶
Create and fill: Inspector, Admin. Checklist templates: Admin. Upload Engineers and Viewers read. No maker-checker on inspections themselves; the issues they raise follow the issue rules.
Common mistakes and troubleshooting¶
- "This inspection has no checklist items." — add items (one per line) or instantiate from a template.
- Punch list is empty — it lists open issues raised by failed items; nothing failed yet.
- Photo upload fails on site — offline; the app queues it and uploads when back online.
Limitations and integration prerequisites¶
None external. CSV import needs the column names exactly as listed.
Where to go next¶
Safety (incidents)¶
What it does¶
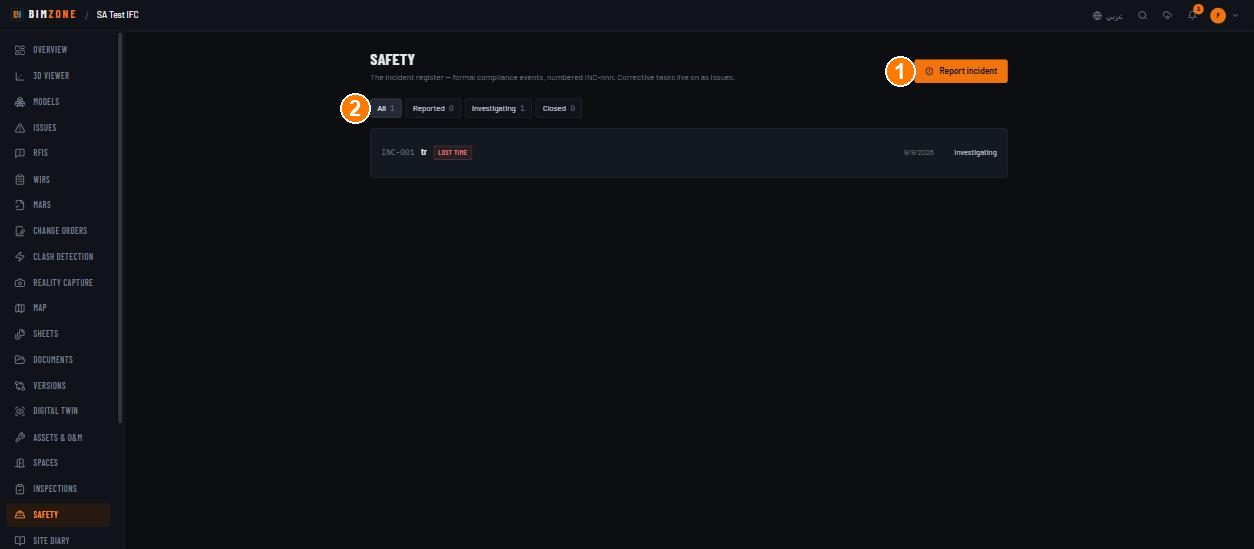
The incident register — formal compliance events numbered INC-nnn with type, severity, people involved, location, investigation and corrective actions. Corrective tasks live on as issues.
Who uses it and why¶
HSE officers and site management. Anyone with a non-viewer role can report.
Prerequisites¶
A project. Closing an incident is an admin action.
Step-by-step¶
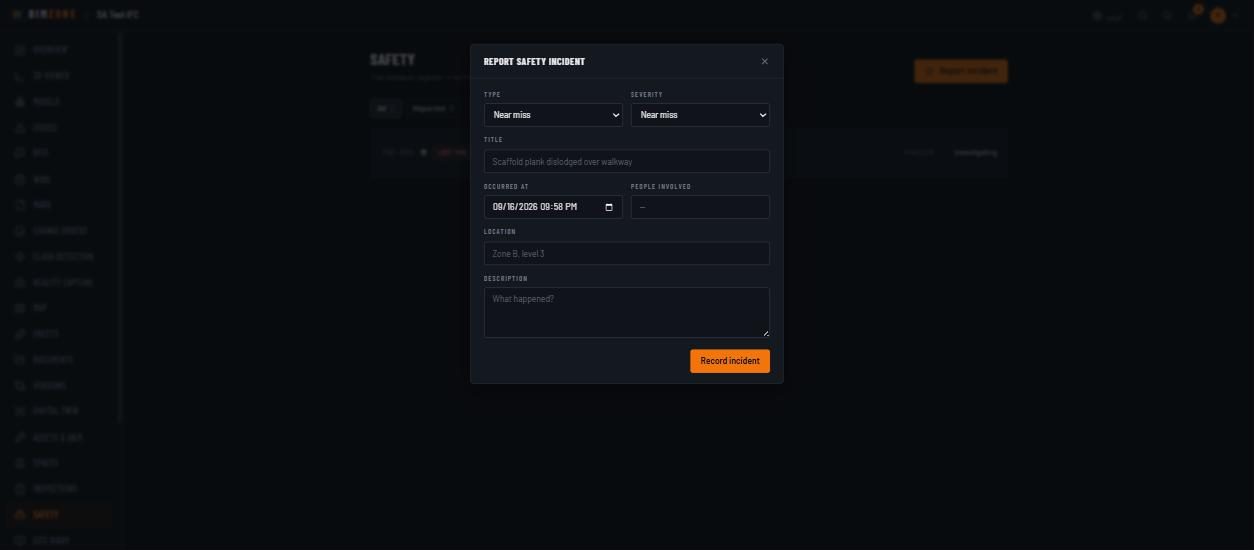
- Safety › Report incident: Type (Near miss · Injury · Property damage · Environmental · Security), Severity (Near miss · First aid · Medical treatment · Lost time · Fatality), Title, Occurred at, People involved, Location, Description. Record incident (state Reported).
- Open it › Start investigation (state Investigating); record Corrective actions ("What has been done to prevent a recurrence?").
- Raise issues for the corrective tasks and link them; when done, Close incident.
Controls¶
Filters All / Reported / Investigating / Closed · Report incident · incident drawer with Start investigation, Corrective actions, Close incident, delete.
What happens after¶
The incident number is permanent; status changes are audited; the Site Diary and Analytics count incidents.
Connections to other modules¶
Issues (corrective tasks), Site Diary, Analytics, Inspections (safety-type inspections).
Data in / data out¶
In: the form. Out: register only (no PDF).
Permissions and approval¶
Report and investigate: any non-viewer member. Close incident: Admin. No maker-checker.
Common mistakes and troubleshooting¶
- Close incident is missing — you are not a project admin.
- Cannot edit an incident — Viewers cannot; every other role can report and update.
Limitations and integration prerequisites¶
No regulator export format.
Where to go next¶
Site diary¶
What it does¶
One record per day: the crew's observations (weather, temperature, manpower, equipment, deliveries, delays, notes) beside everything the platform captured that day (photos, issues opened/closed, RFIs opened/answered, clashes detected).
Who uses it and why¶
Field engineers and inspectors write it; project management and claims teams read it.
Prerequisites¶
Role Inspector, Upload Engineer or Admin to author ("Field engineers and inspectors can author them.").
Step-by-step¶
- Site Diary › pick the date (‹ › or the date field).
- Fill Field record: Weather (Clear · Cloudy · Overcast · Rain · Storm · Wind · Fog · Heat · Cold), Temp °C, Manpower on site, Equipment / plant, Deliveries, Delays & constraints, Notes. Create entry (later Update entry).
- Read Day in review — from project records beside it; it is computed, not typed.
- Written-up days in
lists the days that have an entry.
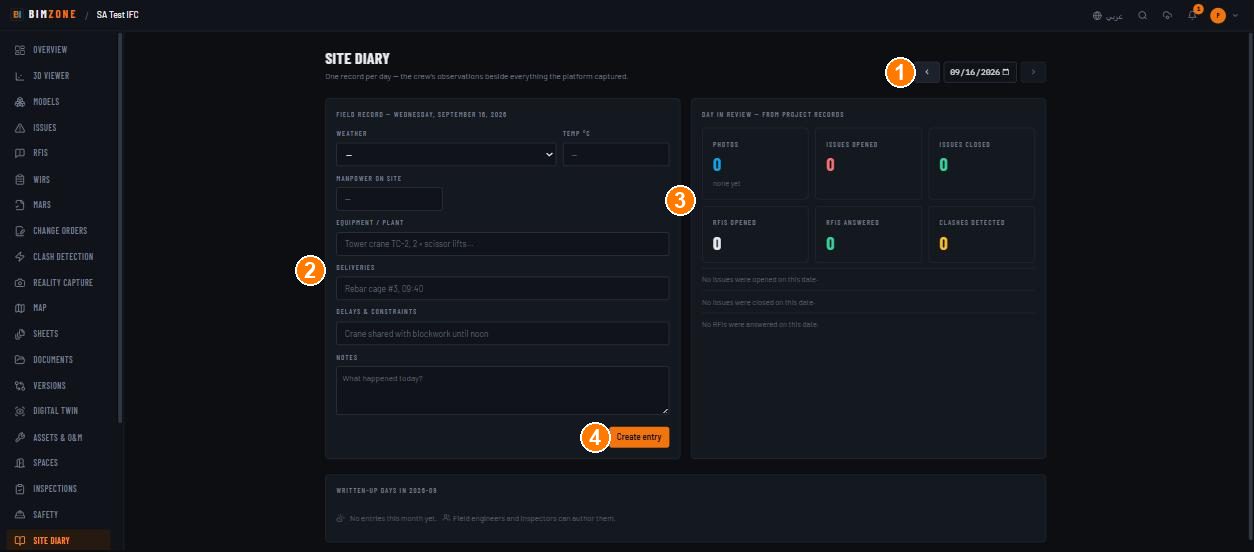
1 · date navigation · 2 · field record form · 3 · day in review (computed) · 4 · Create entry
Controls¶
Date navigation · the field record form · Create entry / Update entry · delete entry · month list.
What happens after¶
The entry is stored per day per project; the computed panel updates as records change.
Connections to other modules¶
Issues, RFIs, Clash Detection, Reality Capture (photos), Safety.
Data in / data out¶
In: the form. Out: the diary is included in the offline copy registers; no separate PDF.
Permissions and approval¶
Author: Inspector, Upload Engineer, Admin. Read: everyone. No approvals.
Common mistakes and troubleshooting¶
- Form is read-only — Viewer role.
- Day in review shows 0 photos — photos are counted from Reality Capture uploads dated that day.
Limitations and integration prerequisites¶
One entry per day; no weather-service integration (weather is typed).
Where to go next¶
Reality capture¶
What it does¶
Floor plans (uploaded or generated from a point cloud) with 360° photos, standard photos, drone imagery and walkthrough videos pinned to locations, capture routes with waypoints, a TimeTravel date filter, bulk photo upload with GPS auto-pinning, and the source of the viewer's 360 scene and Split modes and the digital twin's "Site reality" panel.
Who uses it and why¶
Inspectors and site teams capture; coordinators and management compare site to model.
Prerequisites¶
Role Admin to add a floor plan (or generate one from a point cloud); Admin or Inspector to upload photos and pin them; any role but Viewer to upload a walkthrough video. A floor plan (PNG, JPG or PDF) to pin onto — or a converted point cloud to generate one from. For 360°: equirectangular JPGs.
Step-by-step¶
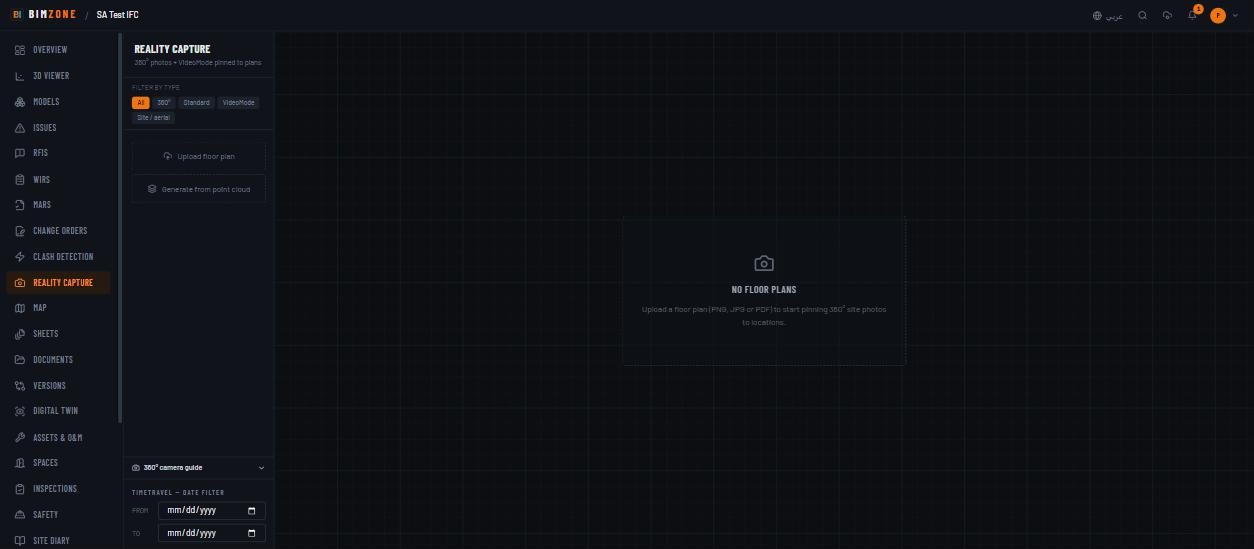
- Reality Capture › Upload floor plan (PNG / JPG / PDF), or Generate from point cloud (pick the Point cloud, Floor elevation (m), Band ± (m), Generate plan — "Plan generation queued — it will appear here when ready").
- Open the plan › Pin photo: Photo file (equirectangular JPG for 360°), Capture type (360° · Standard photo · Drone imagery), Capture date, Tags (comma separated), Notes; click the plan to place it.
- Bulk photo upload: Select photos, Capture type, Capture date, Auto-place pins from GPS (EXIF) ("Photos with GPS are pinned automatically using the project georeference."), Upload N photo(s). Offline: "Photos are saved to your device and upload automatically when you reconnect."
- Upload walkthrough video (MP4, MOV or WebM) with a Frame extraction interval (every 1 / 2 (recommended) / 5 seconds) — VideoMode frames become pinned photos along a Capture route (Route name, waypoints, "Waypoint on another floor").
- Filter by type (All · 360° · Standard · VideoMode · Site / aerial) and by TimeTravel — date filter (From / To) to compare dates. Read the 360° camera guide (field workflow, recommended cameras, naming tips for TimeTravel).
Controls¶
Filter by type · Upload floor plan · Generate from point cloud · 360° camera guide · TimeTravel date filter · per plan: Pin photo, bulk upload, Upload walkthrough video, Capture routes, Name capture route, Delete route, View settings, Sheets (jump to the sheet).
What happens after¶
360° photos appear in the viewer's 360 scene mode and enable Split; the digital twin surfaces the nearest capture to a selected element; photos count in the Site Diary and Analytics ("Captures per week"); EXIF/XMP/IPTC metadata is stripped from stored JPEGs.
Connections to other modules¶
Viewer (360 / Split), Digital Twin, Site Diary, Analytics, Inspections (photo evidence), Map (photo markers when georeferenced), Models (point clouds).
Data in / data out¶
In: images, videos, plans. Out: Analytics › photos CSV / XLSX, /api/feed/photos; the offline
copy bundles recent photos.
Permissions and approval¶
Floor plans (upload / generate): Admin. Photos and pins: Admin, Inspector. Walkthrough video: Admin, Upload Engineer, Inspector. Read: everyone. No approvals.
Common mistakes and troubleshooting¶
- "No converted point clouds in this project yet." — upload a
.las/.laz/.e57/.ply/.ptsunder Models first. - GPS pins land in the wrong place — the project georeference is wrong or unset (Settings › Georeferencing).
- "N uploaded photo(s) have GPS but no pin on this plan." — press Place N pin(s) from GPS.
- 360 scene mode still disabled — the photo must be uploaded as capture type 360° and be an equirectangular JPG.
Limitations and integration prerequisites¶
Video frame extraction runs on the server (FFMPEG_PATH); without ffmpeg, video upload fails.
Where to go next¶
Progress¶
What it does¶
Observed completion versus the planned schedule — by storey, discipline and task — detecting what is behind, with an S-curve over time and snapshots.
Who uses it and why¶
Planners and project managers.
Prerequisites¶
A programme imported under Standards & 4D › Schedule and observed element progress (from activity links with actual % on the WBS task tree, or per-element Progress override in the viewer).
Step-by-step¶
- Import the programme and link activities to elements (4D & 5D).
- Record observed progress: actual % per task in the WBS task tree, or Progress override on an element in the viewer.
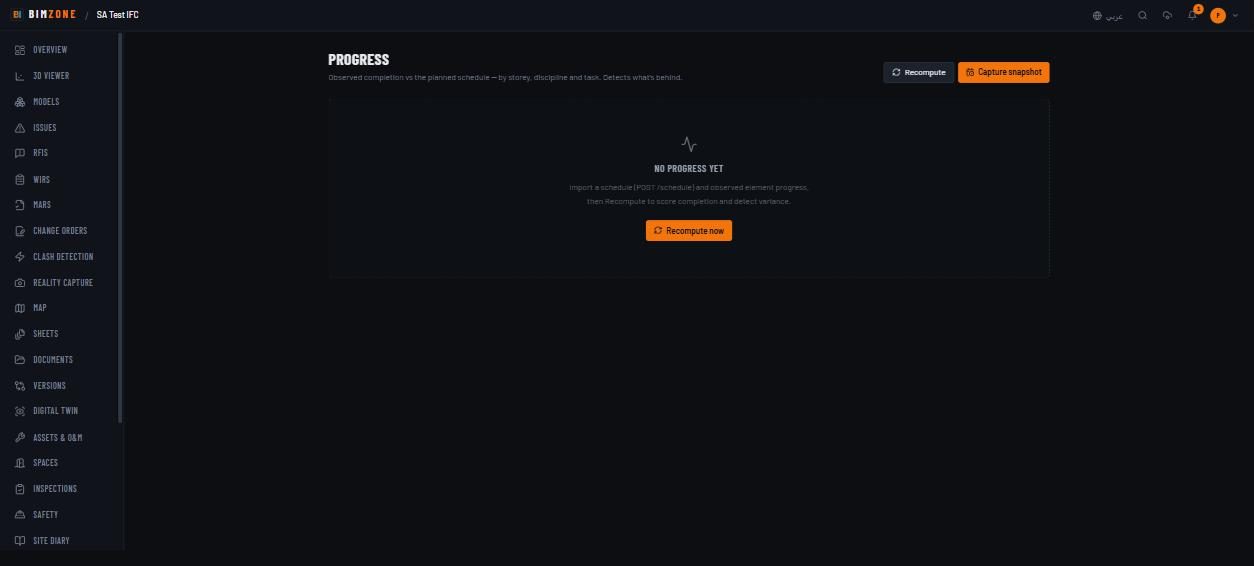
- Progress › Recompute ("then Recompute to score completion and detect variance").
- Read Progress by storey, Progress by discipline, Observed vs planned — by task (Planned · Observed · Variance · Status, "Behind schedule" flags) and the S-curve.
- Capture snapshot to freeze today's figures for the S-curve history and the progress report.
Controls¶
Recompute · Capture snapshot · Recompute now (empty state) · the three breakdowns and the S-curve.
What happens after¶
Recompute rewrites the observed figures; snapshots feed Analytics › Progress S-curve and the Progress report PDF and scheduled progress emails.
Connections to other modules¶
Standards & 4D (programme, links), Viewer (overrides), Analytics, Reports, Dashboard (Observed progress column).
Data in / data out¶
In: programme, links, overrides. Out: Progress report PDF (Analytics), scheduled report emails.
Permissions and approval¶
Recompute and snapshot: Admin. Overrides: Admin. Read: everyone.
Common mistakes and troubleshooting¶
- "No progress yet" — no programme, or no observed progress; do steps 1–3.
- Everything reads 0 % — activities are not linked to elements and no actual % was entered.
- An element's figure is stuck — it has a manual override; Clear override in the element panel returns it to the derived figure (setting 0 is a different statement — a claim of "not started").
Limitations and integration prerequisites¶
None external.
Where to go next¶
Change orders¶
What it does¶
Variations to the contracted scope — proposed, reviewed and decided with a full audit trail, with cost impact (exact decimal + currency) and schedule impact (days).
Who uses it and why¶
Commercial teams raise and negotiate; the approver (never the submitter) decides.
Prerequisites¶
Any role but Viewer to raise; a project Admin other than the submitter to approve or reject.
Step-by-step¶
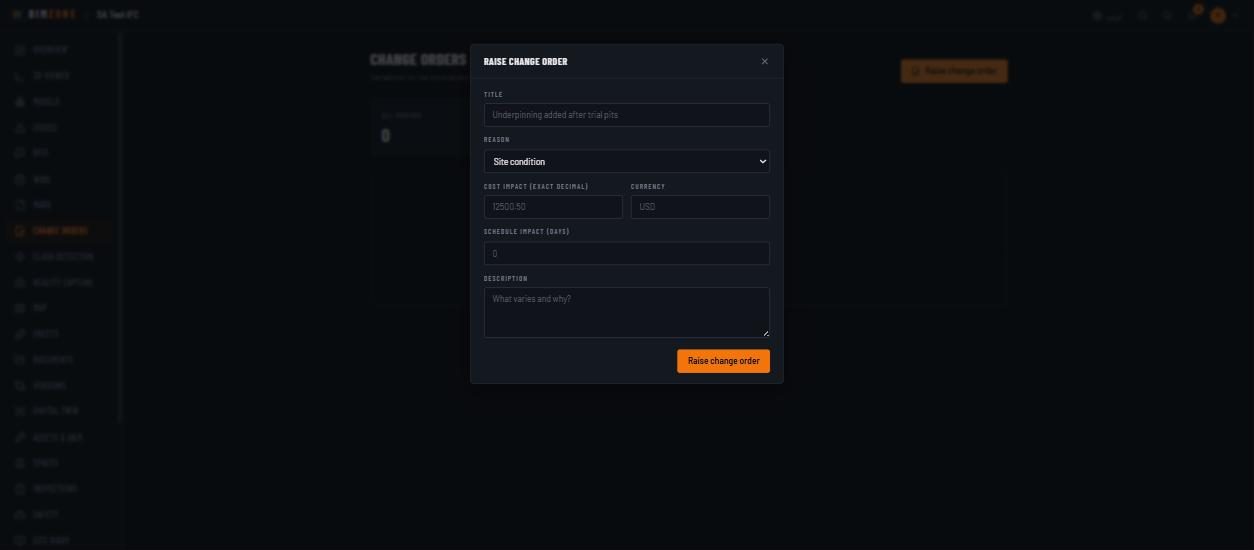
- Change Orders › Raise change order: Title, Reason (Client request · Design change · Site condition · Error / omission · Regulatory · Other), Cost impact (exact decimal), Currency, Schedule impact (days), Description ("What varies and why?"). Raise change order (state Proposed).
- Submit for review (state Under review).
- A second person presses Approve or Reject (with a Rejection reason).
Controls¶
Raise change order · KPI All orders · rows with reason, cost impact, schedule impact, Raised by · Submit for review · Approve · Reject.
What happens after¶
Decisions are audited; approved cost impact is a commercial record (it does not automatically alter the programme budget — book actual costs under 4D & 5D › Cost).
Connections to other modules¶
RFIs (source of many changes), Takeoff & Cost, Analytics.
Data in / data out¶
In: the form. Out: register only.
Permissions and approval¶
Raise: Admin, Upload Engineer, Inspector. Approve / Reject: a project Admin other than the submitter (maker-checker on top of the admin gate).
Common mistakes and troubleshooting¶
- Approve missing — you raised it, you are not a project Admin, or it is still Proposed (submit for review first).
- Amount rejected — use an exact decimal (12500.50), not a formatted string.
Limitations and integration prerequisites¶
No contract-management or ERP sync; the accounting connector (Odoo) covers invoices and cost codes, not change orders.